


When homeowners picture a roof, they usually think about shingles or metal panels. Yet many roof leaks start where the roof changes direction or meets something else. Those areas depend on flashing.
Roof flashing is a system of metal or other approved waterproofing components installed around vulnerable transitions such as chimneys, walls, valleys, vents, skylights, and roof edges. Its job is to guide water away from joints that roofing materials alone cannot reliably seal.
In Edmonton’s rain, snow, freeze-thaw cycles, and wind-driven weather, properly installed flashing is essential.
What Is Roof Flashing?
Flashing creates a water-shedding transition between roofing materials and penetrations or adjoining surfaces. Instead of relying only on caulking, flashing overlaps components so gravity directs water back onto the roof surface and toward drainage areas.
A durable detail usually combines correct flashing shape, proper layering, sound roofing materials, and sealant only where the system calls for it. Caulking by itself is not a substitute for correctly designed flashing.
Where Flashing Is Commonly Used
Chimney Flashing
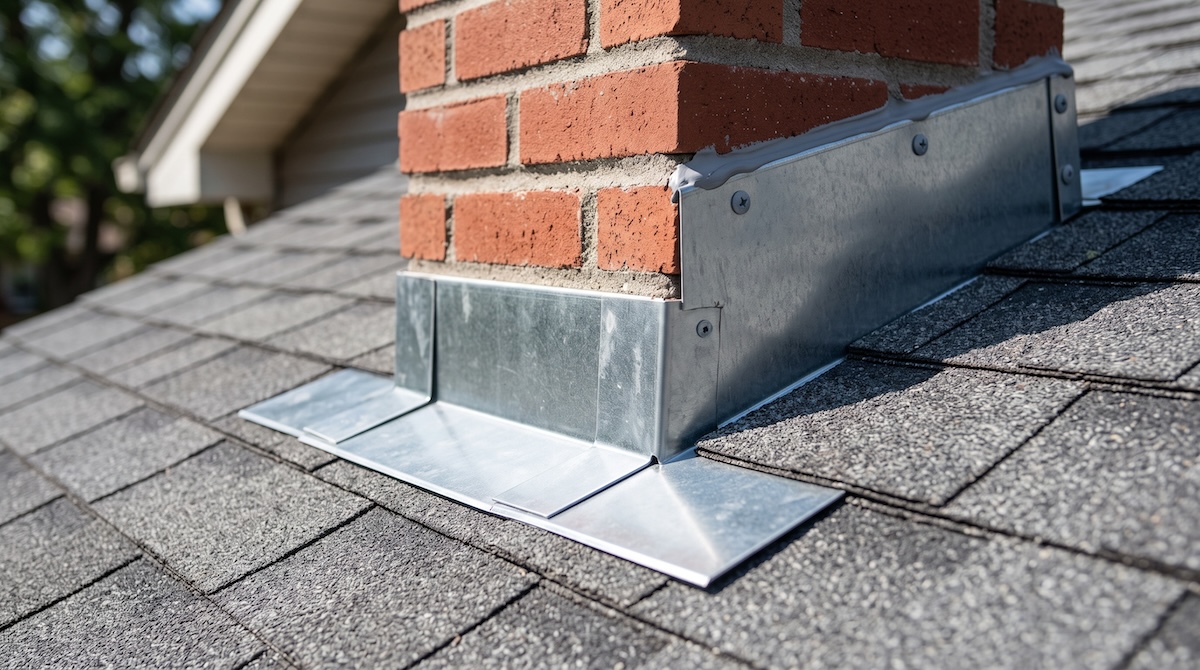
Chimneys interrupt the roof surface and create several joints where water can enter. Proper chimney flashing typically uses components that integrate with both the roof covering and chimney. Larger chimneys may also need a cricket or saddle to divert water around the uphill side.
Roof-to-Wall Flashing
Where a sloped roof meets a vertical wall, step flashing is commonly woven with courses of shingles so water is directed downward and outward. Counterflashing or wall cladding details help protect the upper edge.
Valley Flashing
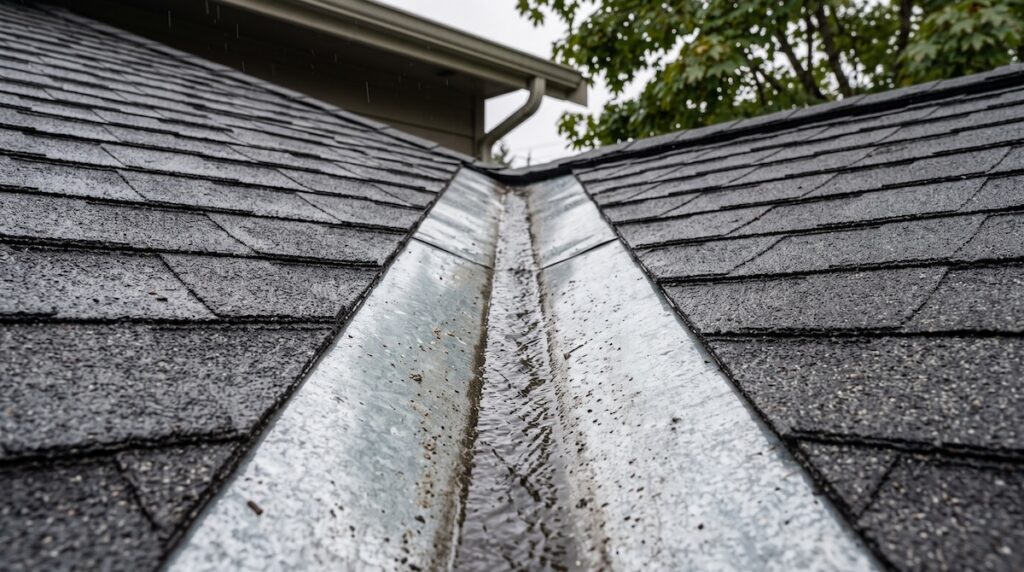
Roof valleys handle concentrated runoff from two slopes. Depending on the roofing system, valleys may use exposed metal, underlayment, or specific shingle installation methods. Because so much water moves through a valley, small installation errors can become serious leaks.
Vent and Pipe Flashing
Plumbing stacks and roof vents need boots or flashing assemblies around their bases. Rubber seals can crack with age and cold exposure, while metal components can loosen or corrode.
Skylight Flashing
Skylights need manufacturer-appropriate flashing integrated with the roofing system. Improvised sealant repairs may stop water temporarily but can hide a larger installation problem.
Why Flashing Fails
Age and Weather Exposure
Metal expands and contracts as temperatures change. Rubber components become brittle. Fasteners can loosen. Edmonton’s wide temperature range can accelerate stress at transitions.
Poor Installation
Flashing must be layered in the correct sequence. If pieces are reversed, too short, improperly fastened, or dependent on surface caulking, water may find a path behind the roofing materials.
Roof Repairs That Disturb Existing Flashing
Replacing shingles near a chimney, wall, or vent can affect flashing. Reusing damaged or incompatible components may create a weak point even when the surrounding shingles are new.
Building Movement
Homes naturally move slightly with temperature and seasonal changes. Chimneys and roof framing may also move differently. Flashing needs to accommodate these transitions while continuing to shed water.
Storm Damage
High winds can loosen metal and roofing materials. Hail can damage nearby shingles or dent exposed components. After severe weather, include flashing in the roof inspection rather than focusing only on shingle surfaces. If a storm caused the damage, documenting it also helps when filing a roof insurance claim.
Signs Your Roof Flashing May Be Leaking
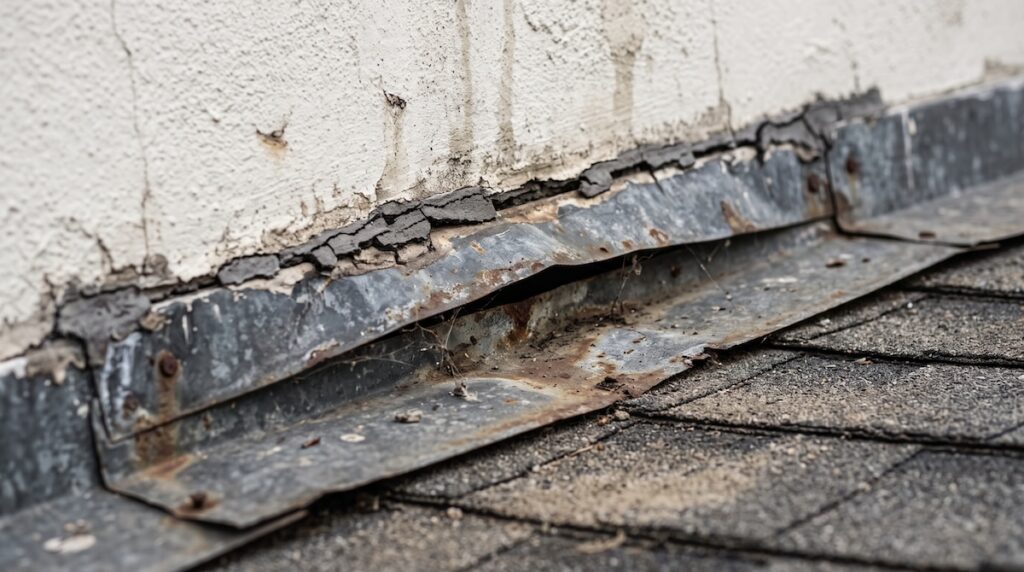
Interior symptoms can include ceiling stains near chimneys, water marks along exterior walls, damp attic framing, peeling paint, or moisture around skylights and vents. Outside, you may notice lifted metal, cracked sealant, rust, missing pieces, or gaps.
However, the visible stain is not always directly below the failed flashing. Water can travel along framing or roof decking before it appears indoors, which is why tracing the source is key to any roof leak repair.
Why Caulking Is Not a Permanent Flashing Strategy
Roof sealants have legitimate uses, but repeatedly applying caulk over a poorly designed joint can create a maintenance cycle instead of solving the cause. Sealant is exposed to ultraviolet light, temperature swings, moisture, and movement.
A proper repair should identify how water is entering and restore the water-shedding detail. In some situations, that means removing nearby roofing materials so flashing can be repaired or replaced correctly.
Flashing During Roof Replacement
A roof replacement should include a careful review of existing flashing. Some components may be reusable if they are in excellent condition and compatible with the new system, while others should be replaced.
Homeowners should ask how the roofing scope handles chimney flashing, valleys, wall intersections, vents, and other penetrations. These details matter as much as the field shingles because they protect the roof’s most vulnerable transitions.
Flashing and Ice Dams
Ice dams can push water into places that normally shed rain without difficulty. Eaves, valleys, wall intersections, and other transition areas may be exposed to backed-up meltwater. Our guide on how Edmonton winters damage your roof covers the warning signs to watch for.
Proper underlayment and flashing details help provide additional protection, but recurring ice dams may also point to insulation, air-sealing, or ventilation concerns that should be investigated.
Can Flashing Be Repaired Without Replacing the Whole Roof?
Often, yes. If the roof is otherwise in serviceable condition and the problem is localized, a roofer may be able to repair a flashing detail and replace affected roofing materials around it.
The decision depends on roof age, material condition, how much surrounding area must be opened, and whether the existing system can be integrated reliably with the repair.
When a roof is already heavily deteriorated, repeatedly repairing individual flashing points may not be the most economical long-term approach.
What a Roofer Checks During a Flashing Inspection
A professional inspection may evaluate visible metal condition, overlaps, fastening, sealant, counterflashing, pipe boots, wall intersections, valleys, penetrations, nearby shingle condition, and signs of moisture inside the attic.
Scherger Roofing’s roof inspection checklist specifically includes chimney flashing, valley flashing, gutters, pipe boots, vents, shingle wear, attic moisture, ventilation, and related components.
Protect the Details That Protect Your Roof
Flashing is not the most noticeable part of a roof, but it often determines whether complicated joints remain watertight. Addressing small defects early can prevent wet insulation, damaged decking, interior staining, and larger repair costs.
Scherger Roofing provides roof inspections, leak repairs, roof replacement, asphalt shingle roofing, metal roofing, cedar roofing, commercial roofing, and emergency service across Edmonton and nearby communities, including Sherwood Park, Fort Saskatchewan, and Beaumont.
If you see signs of leakage around a chimney, wall, skylight, vent, or valley, contact Scherger Roofing at (780) 394-3404 or request a free estimate.
Frequently Asked Questions
What is the purpose of roof flashing?
Roof flashing directs water away from joints, penetrations, and transitions where shingles or panels alone cannot provide reliable waterproofing.
Can damaged flashing cause a roof leak even if the shingles look good?
Yes. A roof can have serviceable shingles and still leak at a failed chimney, wall, valley, vent, or skylight flashing detail.
Should flashing be replaced during a roof replacement?
It should always be inspected. Whether a particular component is reused or replaced depends on its condition, compatibility, and the roofing system being installed.
Can I fix flashing with roof sealant?
Sealant may be part of certain repairs, but it should not be used to hide an incorrectly installed or failed flashing system. A durable repair addresses the actual water path.